Thursday, February 20, 2020

Martian Frontier Settlement


Still no actual games to report on I’m afraid! I really need to organise some stuff at the club, if I’ve not missed that bandwagon then I should be finishing up some Infinity soon and might get a game of that, and once the weather is a bit warmer I will be ploughing through my Age of Sigmar stuff (I can’t face anything but the most minimal brushwork on that many minis so I will be aerosol and airbrushing basically everything except a few details like washes and weathering for all but character models) and there are always some people playing GW (booo hisss).


I’ve mainly been getting on with my second terrain project, the one for my working title 15mm sci fi project, ‘Free Mars’. The terrain I have been constructing has been for the ‘Second Martian Revolution’ which occurs when Mars has been terraformed to a breathable but not comfortable state and humans have made contact with aliens/created uplifts/genetically modified themselves into diverse forms (haven’t settled yet). I already have boards to do 2”x2”, 2”x4” and 4”x4” setups and a cloth matt (an ancient out of production GW flocked desert one I got during the storage clear out the local GW did before relocating) that I have sprayed to be Martian hued. On this I’m putting some Illiada buildings and MDF roads from a seller called JB Wargaming Scenery (on FB and ebay), with rocks and outcroppings and patches of hardy vegetation planned. It’s the buildings and roads I have been making.


The Illiada kits are great, if you are funny about fine powders or sensitive to dust and the burnt smell you get from laser cutters then you will probably want gloves or at least to give the kits a bit of a wipe down first. They are a good sturdy card stock and cut and assemble easily enough. You need to be a little careful as even though its thick cardstock it is still cardstock and can get bent up if pressure is put on them in the wrong way. Once assembled and glued to a base they are considerably sturdier, however. You get a lot detail in these kits, they are great just as they are but it only takes a little greeble to really start to set them off. My aim is to construct something like a believable functioning settlement of a few families. I don’t have everything I need for that yet but I think I have a pretty good start, including a school, communications tower/drone controller, lots of storage and some Hydroponics (not enough to feed everyone yet but as said its a start).
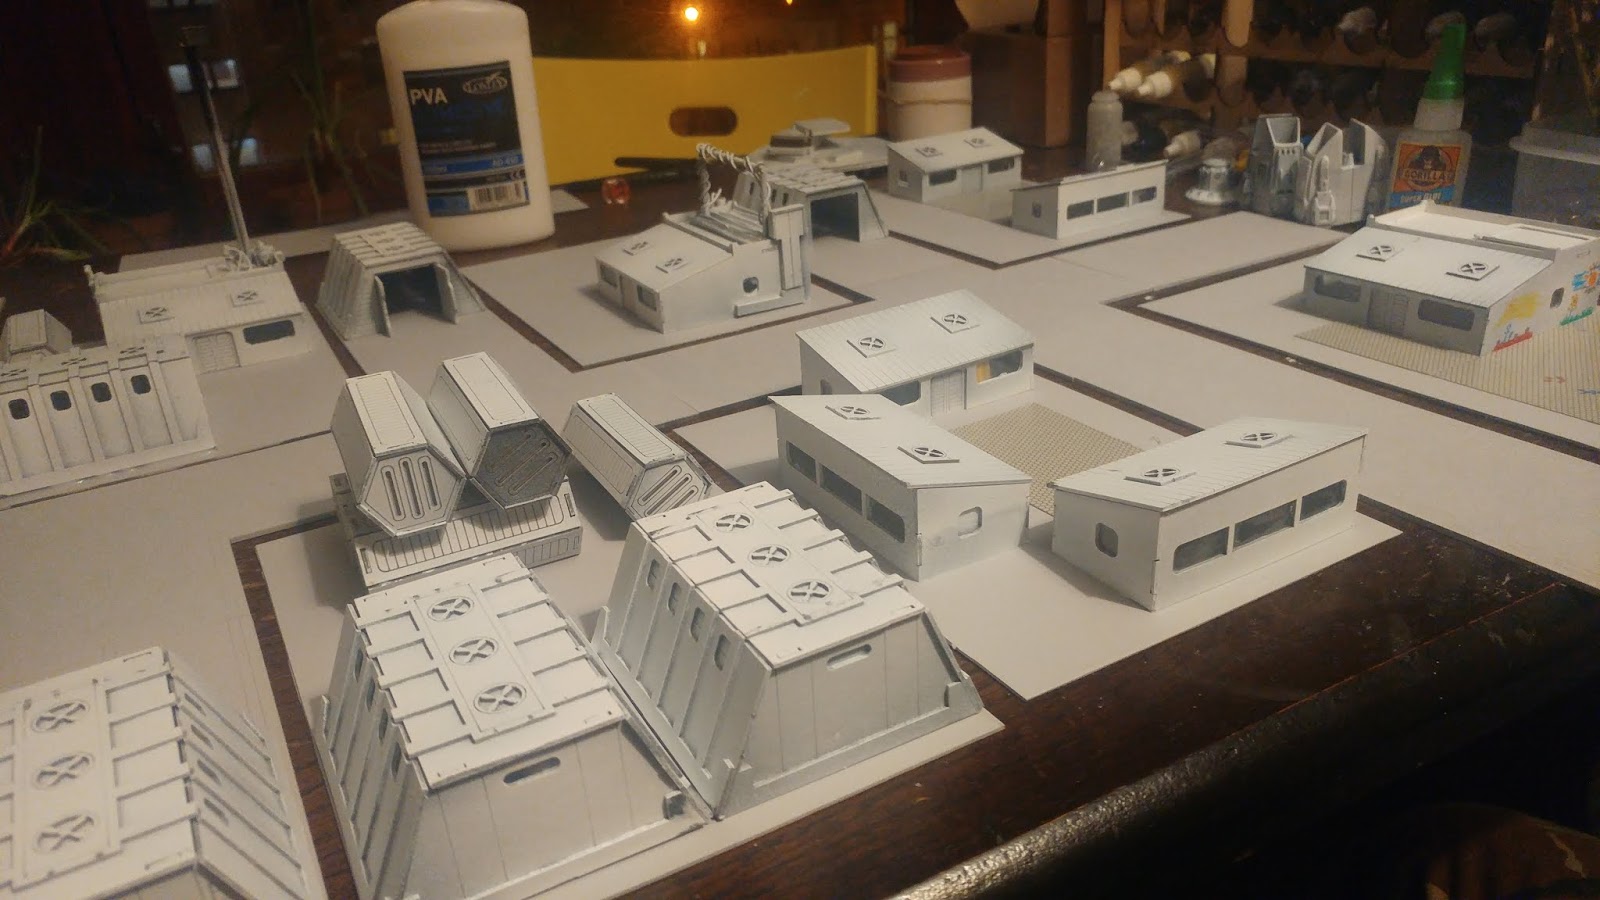
 Here everything is contucted and layouts being tried out. some in progress construction crew and vehicles for scale.


As far as painting goes I hit the bases (scrap perspex tiles) and the roads with Rust-oleum concrete texture paint (nice stuff, they have lots of different texture sprays that look great for scenery uses), and the buildings with molotow premium dark grey and then, once that dried, flat white. After that I used white spirit and various hues of oxide pigments (red predominantly of course) to give everything a wash that I hope does a good job of mimicking the sort of very fine desert dust that coats and sticks to everything. My first go was far too heavy and looked more like heavy rust so I gave those a scrub down with tissue with improved it a lot and was more sparing and careful with the rest.

  Too much!

Starting to look a bit better, panic over.

I also used some felt tip pens to add a bit of colour to the buildings and especially the school. I also used some hex paving card intended for model train scenery around the school and the houses (is it sci-fi scenery if it doesn’t have hexes?).

 The fact this is meant to be a mural made by children craftily dsguises my terrible freehand. On the left: Mars, on the right: Earth
 a seesaw and a swing are under construction for the playground as well as a low wall.
 Good but needs more life supporting greeble.

As things stand I think it is gameable as is right now but I have lots that I want to add, water tanks, a bit of fencing, playground and street furniture, a few plants (not least for the hydroponics) and a little shading on the buildings won’t hurt either. I may also add a little bit of moss wash to the hydroponic building to represent that it is comparably much wetter. It has also been suggested that I supplement the concrete roads with dirt tracks to help with making the settlement look lived in and I think that would look great and soften the transition at the road terminations so that is planned too.


That is it for now I will hopefully have more to show off soon!

Thanks for looking.

Tuesday, January 7, 2020

Plans Plans Plans


I’m back again after a busy hiatus from hobby stuff.
Plus, it was just too cold to be able to sit still painting for a few hours. Probably still is but my hands are getting ITCHY to paint something.

Gaming wise there is not much news there except I did finally get to run a one-shot RPG session of Fear Itself (Pelgrane Press’ GUMSHOE game of ordinary people finding themselves in horrific scenarios) in which the players were a group of ‘content creators’ for not-Buzzfeed sent to cover a cheese toss festival in a Midlands town in which everything was not as it seeeeems.  All in all, it was very successful and managed to get everyone genuinely edgy, unsettled, and a bit scared. GUMSHOE is a bit of a weird fit in that Fear Itself characters are specifically not supposed to be good at what the system is designed to handle. As such it was a little bit of work to get everything to run but it ran smooth enough at the table after that work was put in. I am nothing like an expert in the system though so perhaps other more experienced GMs would not have as tough a time setting things up. All the players where brand new to roleplaying and massively enjoyed it though, so hopefully we can get another session of that or another horror focussed game (I have been informed they all want more scares).

Wargaming wise I now have two sizeable space fleets to paint, one from Brigade’s Neo-Soviet line and one from GZGs Kravak line. I have a scheme worked out for the Soviets but I’m still considering how to paint the Kravak (also how to base both fleet’s strike craft, probably armature wire and magnets, 4 to a base).

 Fleets minus strike craft (and turrets and bases in the case of the kravak below).

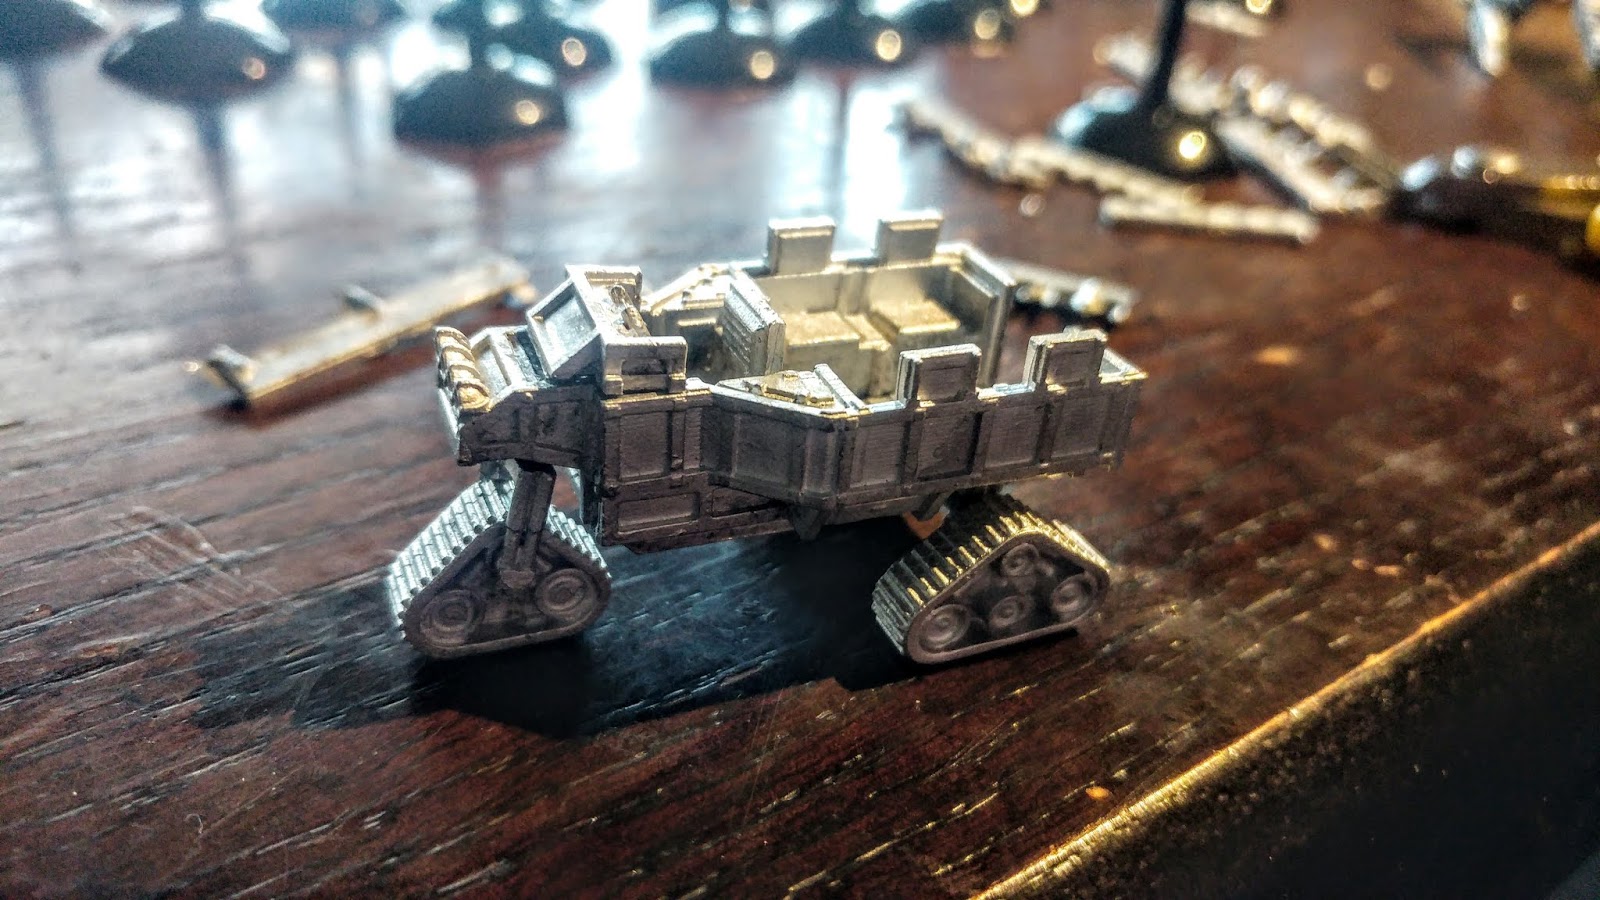
I also want to paint up some civilian stuff for 15mm, colonists, techs, scientists, construction workers, that sort of thing. I have some GZG construction vehicles already and a discount voucher I think I will use to round out what I have. I’m going to do them a bit ad-hoc rather than a more uniform construction crew from a big corporation or something. It will be nice to paint stuff without guns for a change. Partnered with this I think I will also get back to my 15mm Mars scenery.

 Some of the civilian gear.
 I have just realised I may have glued that front shovel's arms on backwards. oh well easy fix.

So projects I’ll be focussing on are: Mars scenery, civilians to populate it, and space fleets. Plus 28mm things when I feel like a break. I’ll aim to have some progress to show pictures off soon and to continue the quest to actually get games with the things I make and paint. To finish off here are some of the 28mm things I will do in between the main projects:

 Spectre Miniatures
 Lucid Eye
 Ramshackle Games
Games Workshop (booo hissss)

Thursday, November 7, 2019

5 Men At Kursk, Board and Armies for the 3rd Battle for Kharkov

A whole project completed! Well. It is complete. Buuut I have plans for improving and expanding on it as is always the way.

So I have been a bit quiet on the blog for a while but I have been busy. My 28mm projects took a bit of a break as I got bitten by the bug to finish my 10mm second world war skirmish project.

The are all based for 1:1 skirmish (except in cases where it was impractical to base a weapon team seperately) and the board is a densely terrained 2x2" and I am using them with Nordic Weasel's 5 Men at Kursk rules which focus on very low level squad tactics. Ususally one squad and maybe a couple of support elements. My intention is to model the house to house fighting that occured on the edges of Kharkov during the 3rd Battle for Kharkov in 1943. One of the things I would like to add in the future is buildings that will allow me to represent the sort of buit up terrain in Kharkov proper. I have pushed some minis around and rolled some dice and I have found it a very easy ruleset to get to grips with. Hopefully I can get another live human opponent soon and I can have a go at writing up a Battle Report on here in the future. I'm hoping to have the rules down and a scenario sorted so that, all being well, I may run it as a participation game at next year's G3 game show. Before getting into the pictures a short note on accuracy: I tried to be accurate but where accuracy would have greatly slowed or stalled the project I did my best to carry on and not worry about it. As such the buildings aren't quite 'right', and there are no doubt errors in uniform depiction. I am happy that everything is 'close enough' though, especially for the chaos of the Eastern Front.

First up here are the armies:


First the Soviets. Now tanks are not massively central in 5MaK but tanks you know? So I have rather more tanks than will see use in one battle. I also found the tanks a good stepping stone down to 10mm for getting my eye in on how to paint at that scale. The two T34-85's where the first that I painted. It was very educational, this was both my first time painting at this scale and my first time having a go at white wash camoflage. I wanted to have quite a stylised look to the whole project with the light/dark contrast emphasised. These first two tanks lack the level of contrast I wanted as I struggled to get a base green that was dark enough to achieve a satisfying contrast with the white wash paint and that wasn't too dark to compromise the scale effect. I am still happy with them but the T34-75 on the left is far closer to my intention. the infantry was tricky but very fun to paint. I leant heavily on washes to catch small details that my hand was not steady enough to get. I went for a solid base of rifleman and a decent selection of squad support attachments to allow me to change the OOB up a bit. I actually already have two field guns ready to paint that I lacked when {I started painting the Soviets so at some point those will be added in.

The Germans. This was my first time painting panzer grey and it was a little bit of a challenge to prevent the tanks from looking too 'flat'. I found that modulating between grey and brown filters gave them a more solid and lifelike look to my eye. The tank commanders for the panzer III and IV certainly helped too. I had to sculpt a rather rudimentary representation of winter overalls with some plastic putty onto them, though I am rather happy with the way they look. When it comes to uniforms I decided to go for a little bit of a mix, resulting in potentially questionable accuracy but I think the look is good. At any rate all the pictures I studied showed quite a wide variety of old and new kit and of troops with a mix of snow white and more temperate coloured gear, though there did seem to be a slight propensity to late issue field grey reversible uniforms. I was glad to find few enough examples of camoflage patterns that I felt no need to try to represent them in 10mm. Again I have far more tanks than I will field in one game of 5MaK but I wanted to paint them and so I did! Also again I went for a solid base of rifles and a selection of support, this time with a field gun.


Now the board! I saw enough examples of open gabled roofs in pictures to feel ok about using these sorts of houses on the Eastern Front, though it seems that tiled roofs were very rare and metal, slatted roofing was the norm where thatch wasn't. Again I think these look ok but the roofs will probably be swapped out for metal looking ones in the future. I wanted the board to move from rubbled buildings to shelled but intact buildings to largley untouched to give some transitional, dynamic, visual interest as well as a variety of terrains to fight over despite the small area being fought over. To achieve this I set about my mdf buildints with a pair of old side cutters and a notched up scalpel blade.


I wanted modularity and so I made everything scatter terrain to be placed on a bare board that I sprayed grey/black, washed white, and then lightly sprayed again with a chocolate brown. the roads are simply plastic card (as is the basing for the buildings and scatter) with black mud texture paint sraped over the top. I may revisit the roads with some wet effects and puddles to give it a closer look to the slushy roads seen in pictures. The roads were metalled rather than packed dirt, it is just that the weather and heavy foot and vehicle traffic and rendered them a muddy, slushy morass, with the flat even road surface made visible beneath by passng vehicles. I simply cut a piece of packing plastic into a comb arrangement and used that to scrape the texture paint in the direction I wished the tracks to appear. Oh the telegraph poles are based on pennies rather than plastic card.


One issue I foresee for running the game at a show is that my stylised approach was maybe too succesful in that the models and terrain create such a coherent aesthetic, and the models are so small! that they can get a bit lost. I may place small removable colour flashes on the bases to remedy this. something like a small tag I can just stick to the bottom of the base that will stick out a little.


And there it is! the whole thing! I am extremely pleased with how this has all come together. When I started I did not know how I would achieve everything I wanted. I had a rather strong impression of the kind of feeling and aesthetic I wanted to evoke and started experimenting my way along. I learned a lot during this project. Anyway I hope you have enjoyed this post. Thanks for reading!

Products used (I'll edit if I miss things):
Pendrakken miniatures
Vallejo, paints and textures, snow texture
Mig paint
Serious Play, various bits of scatter materials some tufts, snow, and the seafoam came from them too
Candy Art Studio, snow (I used a lot of different snows!)
The buildings came form an Ebay Shop named banksjohnedward.

Thursday, September 26, 2019

Alternative Armies Contender GNATS Mech and Meerkat Spotter Suit

I jumped on the AA websites offer that the first 100 GNATS mechs sold would come with a free, also new Meerkat. I got mine very quickly in the ever useful little boxes 15mm companies all seem to send their minis in:


The Meerkat is a very nice little mech. It is built off of the Bearcat legs with a new torso with a big cockpit and some antenna/laser bits, a rotary cannon, and some stowage. The stowage is maybe the surprise star of the kit as its been cast to fit really nicely around the torso's contours:


 Very nice profle:
Here is the big'un. It has a decent amount of posability and even though the legs are moddeled in one piece in a standing pose there is enough movement in the sculpt to lend it some dynamism. It is also pleasingly large. It could probably just scrape being used as a 28mm model as is, and deffinitely pass muster if the cockpit windows were modded to look like an unmanned warbot or something.


 It even comes with very nicely detailed jetpacks. So that's nice!
 Nice profile again that also shows design elements that link it in with the Meerkat. It could also maybe fit two people in the cockpit as it looks quite spacious.
These are going to be a lot of fun to get together. I just need to decide which of my 15mm armies het them. Right now I'm thinking they may go to my Free Mars revolutionaries. But also potentially their enemies. I have a few projects to do before I start getting paint on these anyway so I have time to think.